|
I can't easily include pictures of every step, but here are some photos inside the box and "inside" the building process of my latest build. This is an OM design with Oregon Myrtle back & sides, Sitka spruce top, Ebony binding, and Ziricote headplate, rosette, end wedge, and heel cap. The neck is mahogany. A lot has happened by this shot. The sides were bent. The neck block, tail block, and kerf lining was installed. The top was joined, thicknessed, and braces carved. Also, you can see where the lining is ready to join the back. 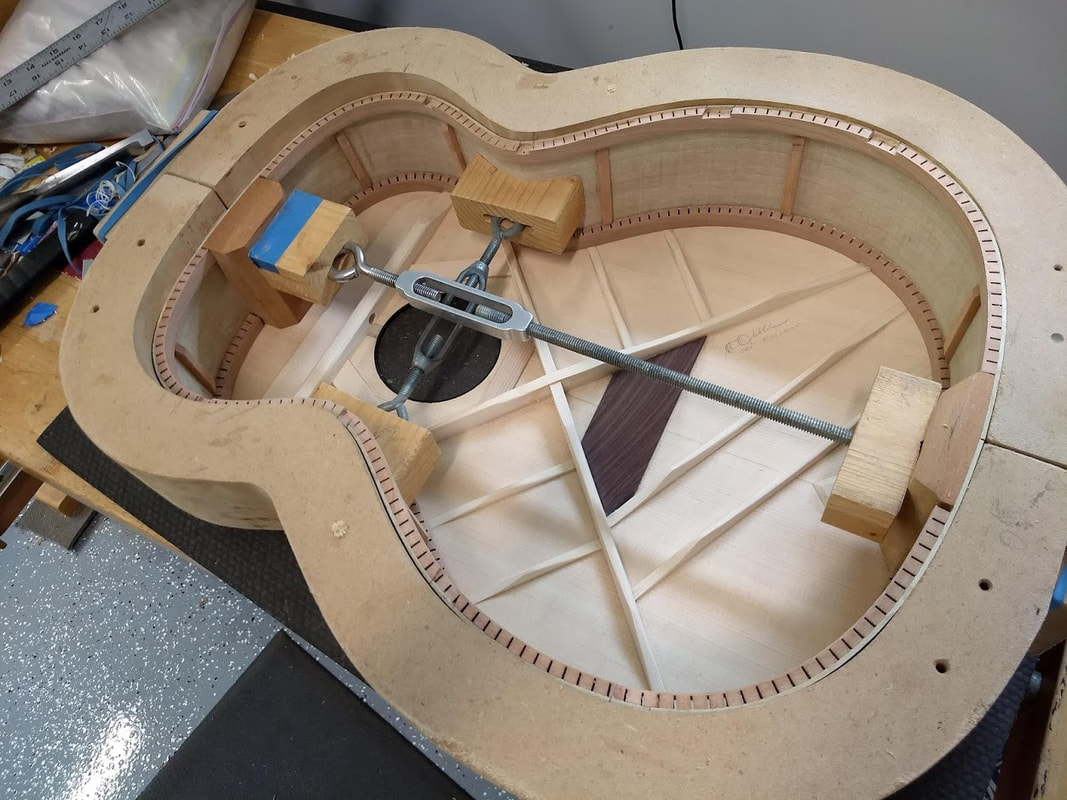 The back has been joined, thicknessed and braced, 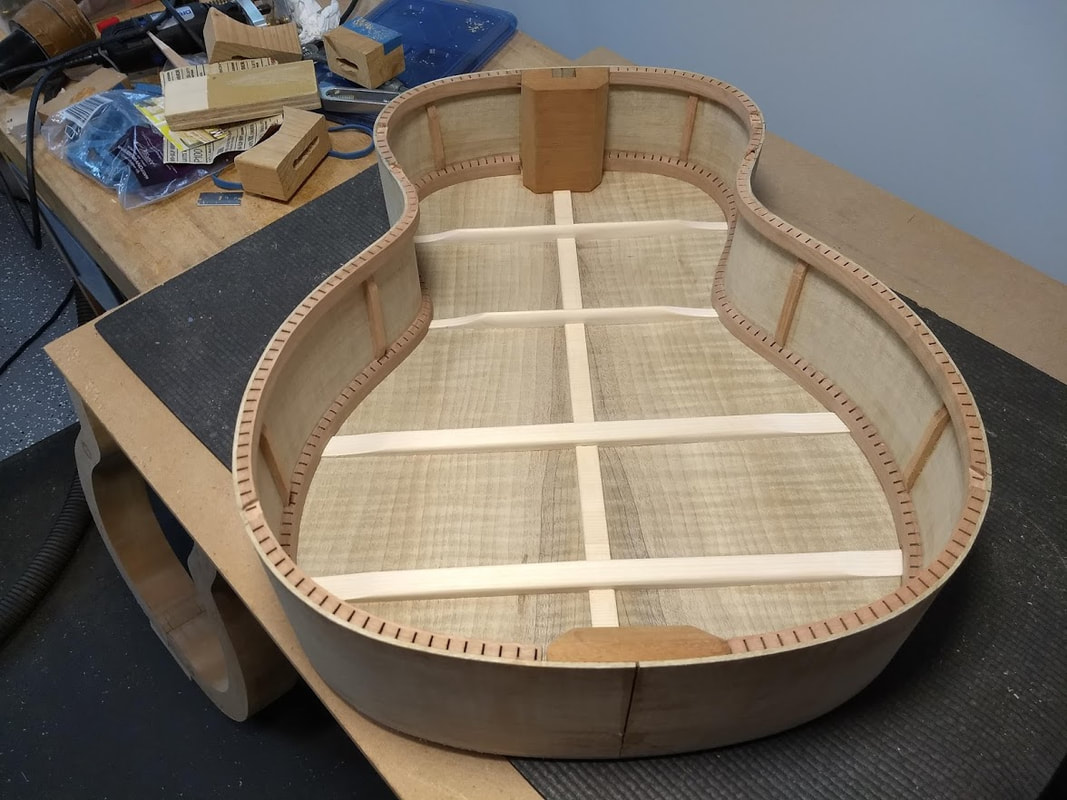 That figuring looks pretty awesome! I wiped on some Naptha. It reveals how the guitar will look under finish. 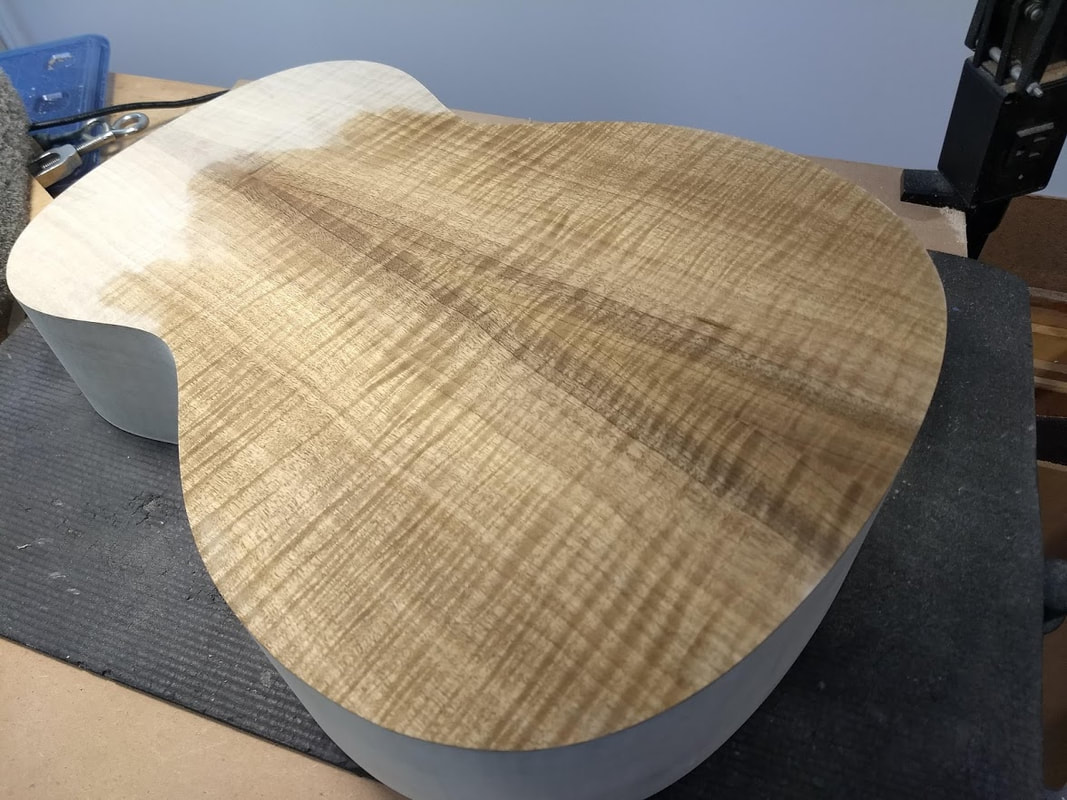 Time for binding... 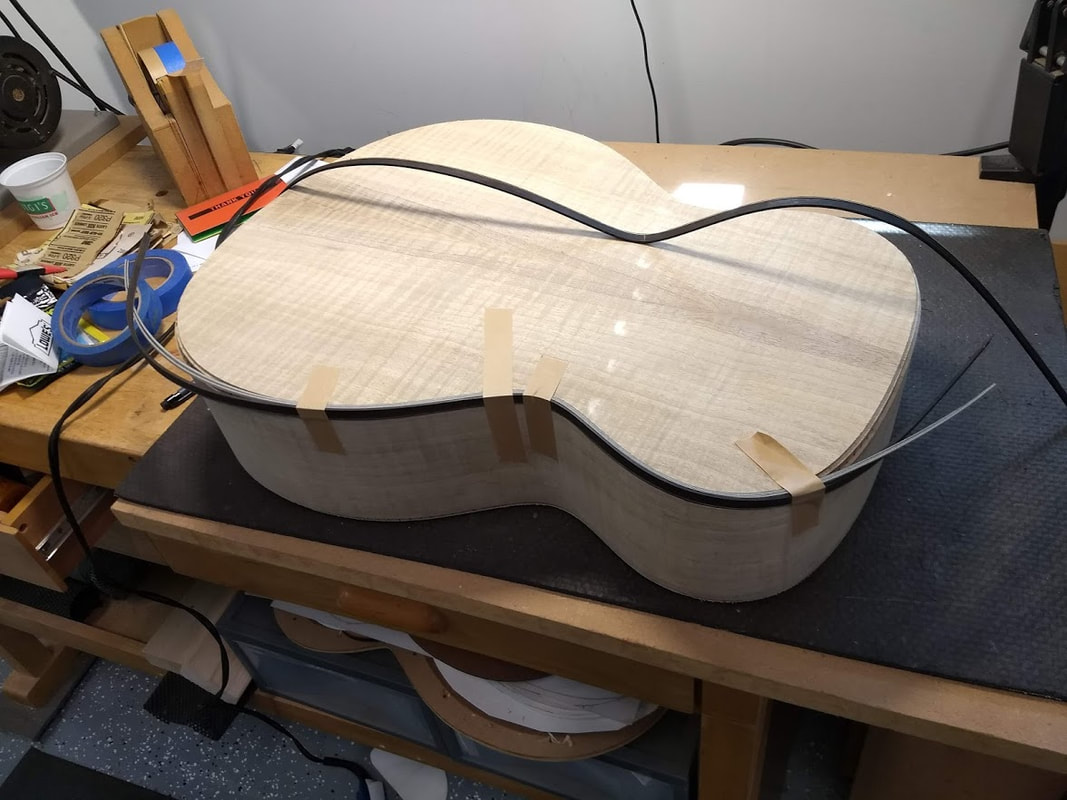 It's getting there.  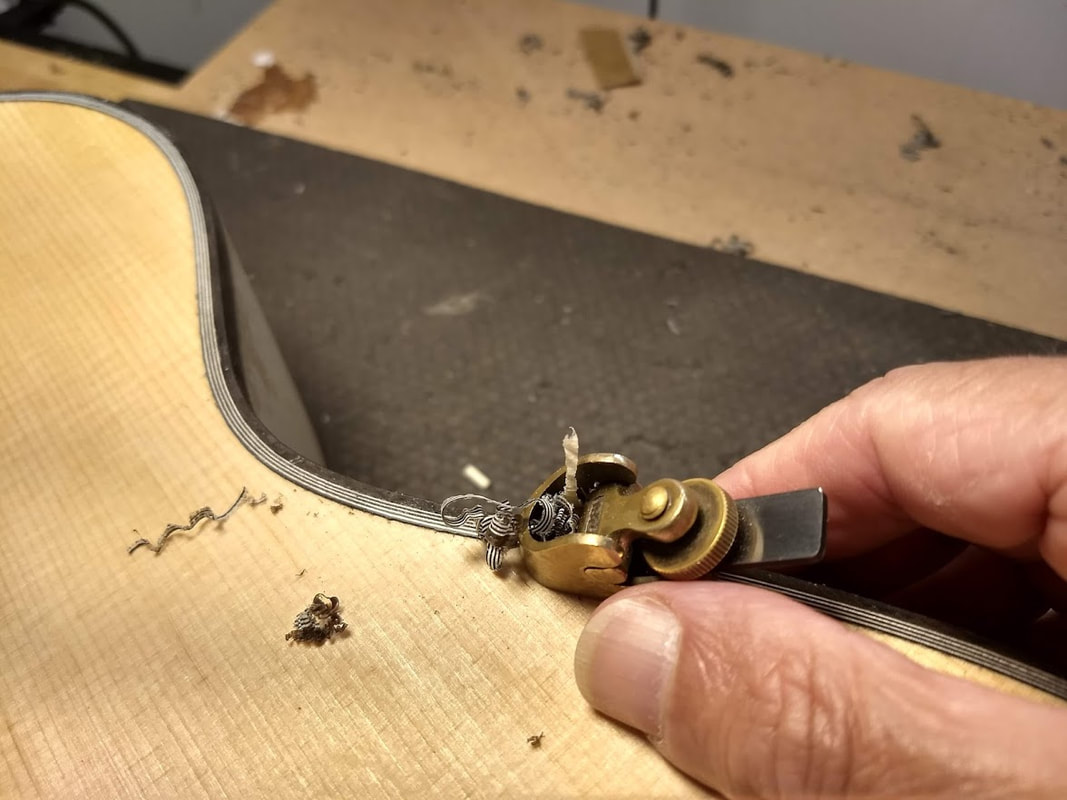 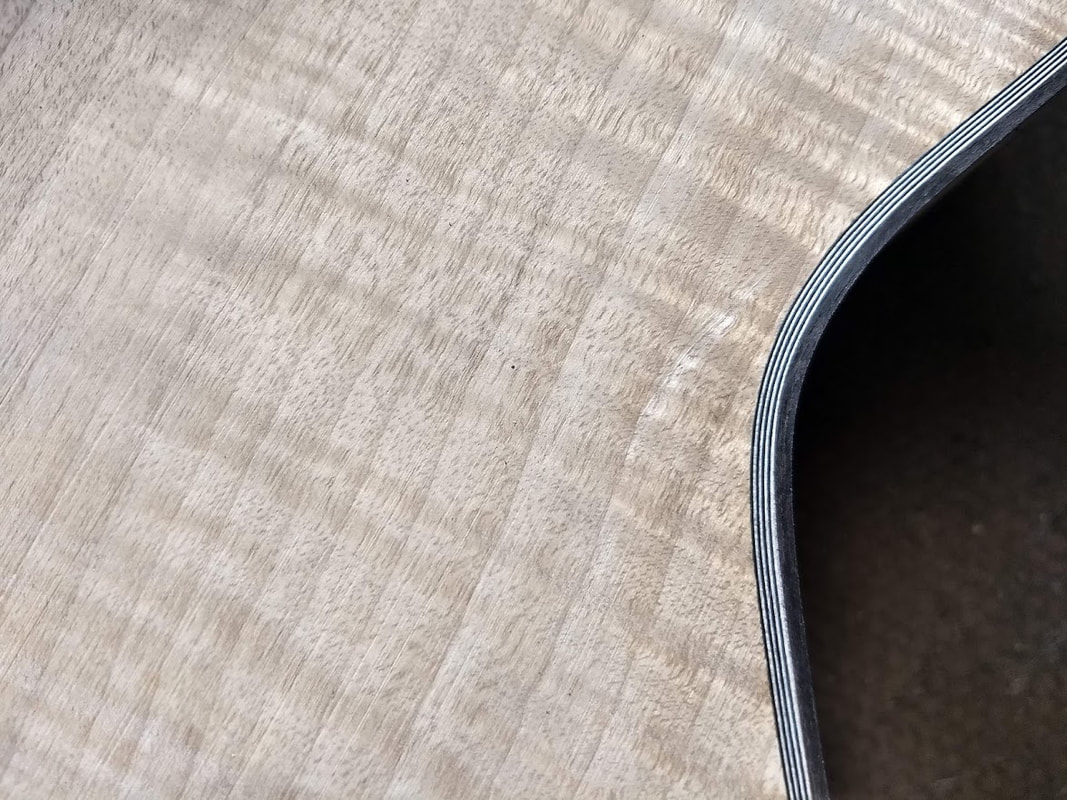 Binding's done. 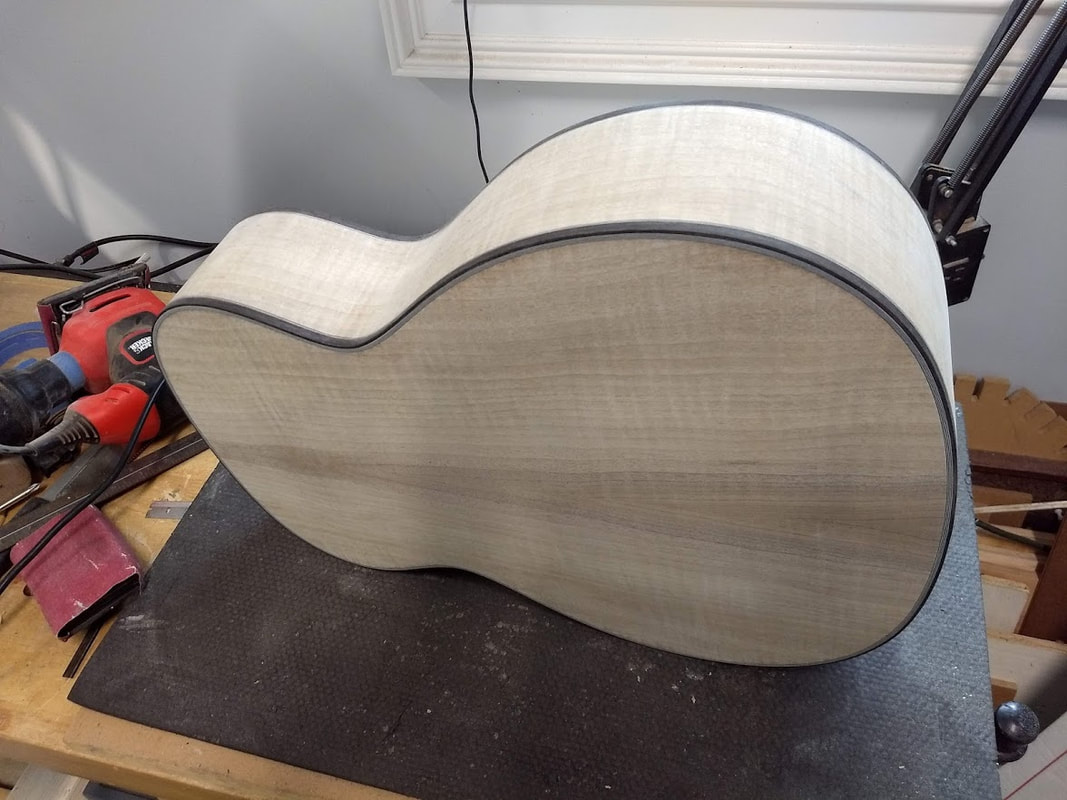 The neck blank has been laminated and shaped.  The fingerboard has been slotted and radiused. 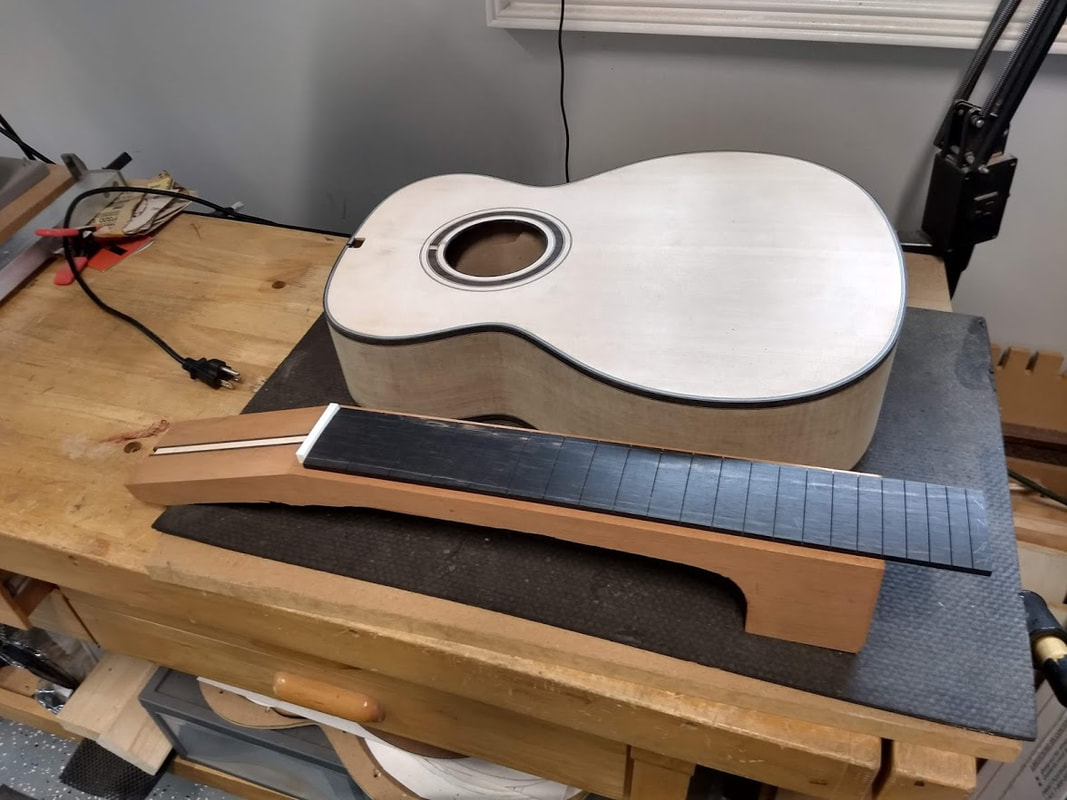  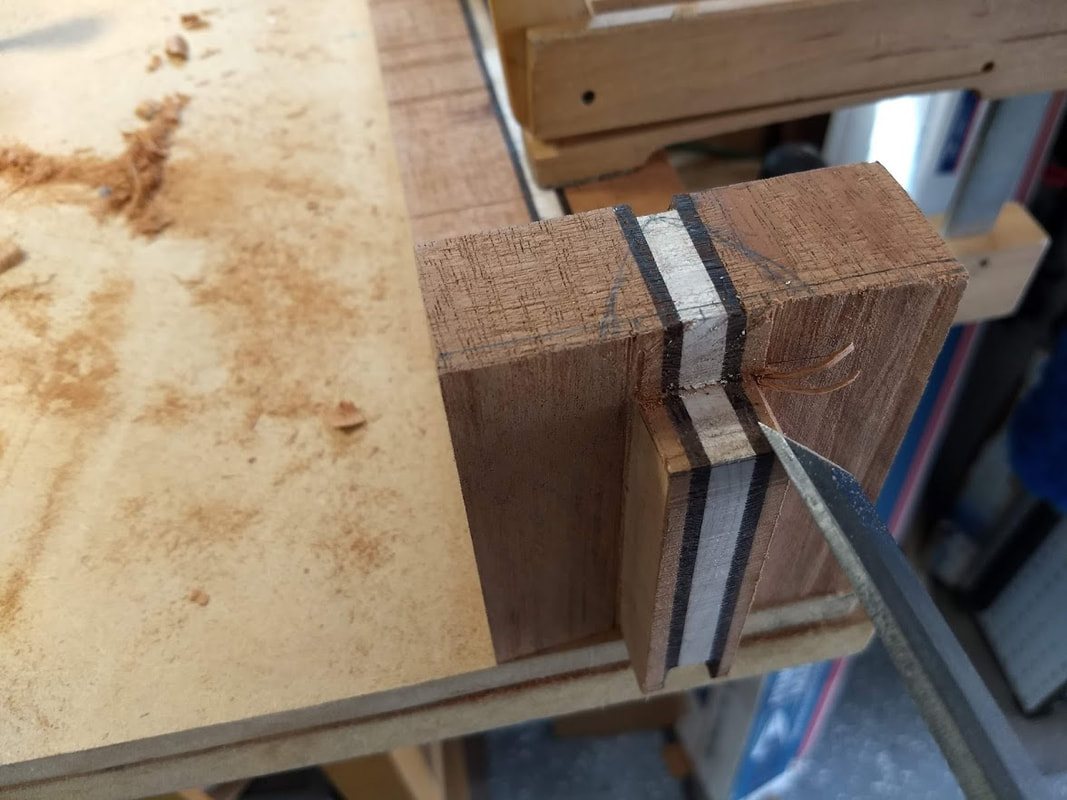 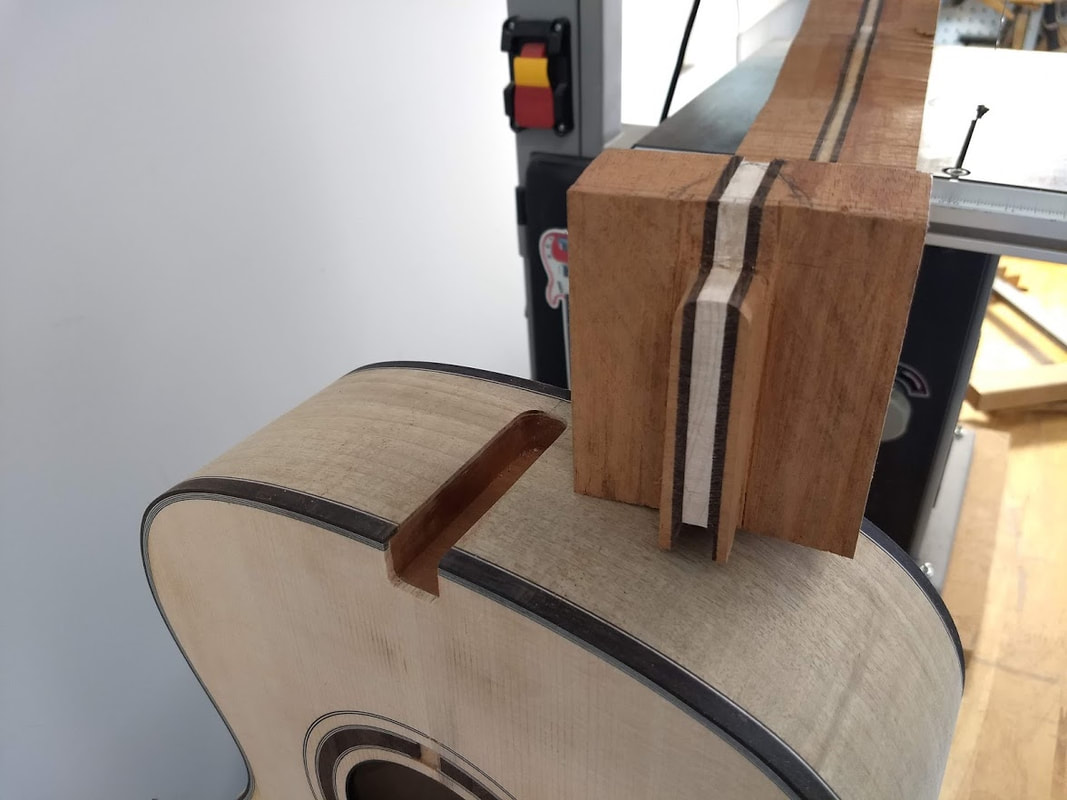 What you don't see here is a lot of work that went into fitting the neck so that the neck is aligned properly so that it can be playable (This is critical). 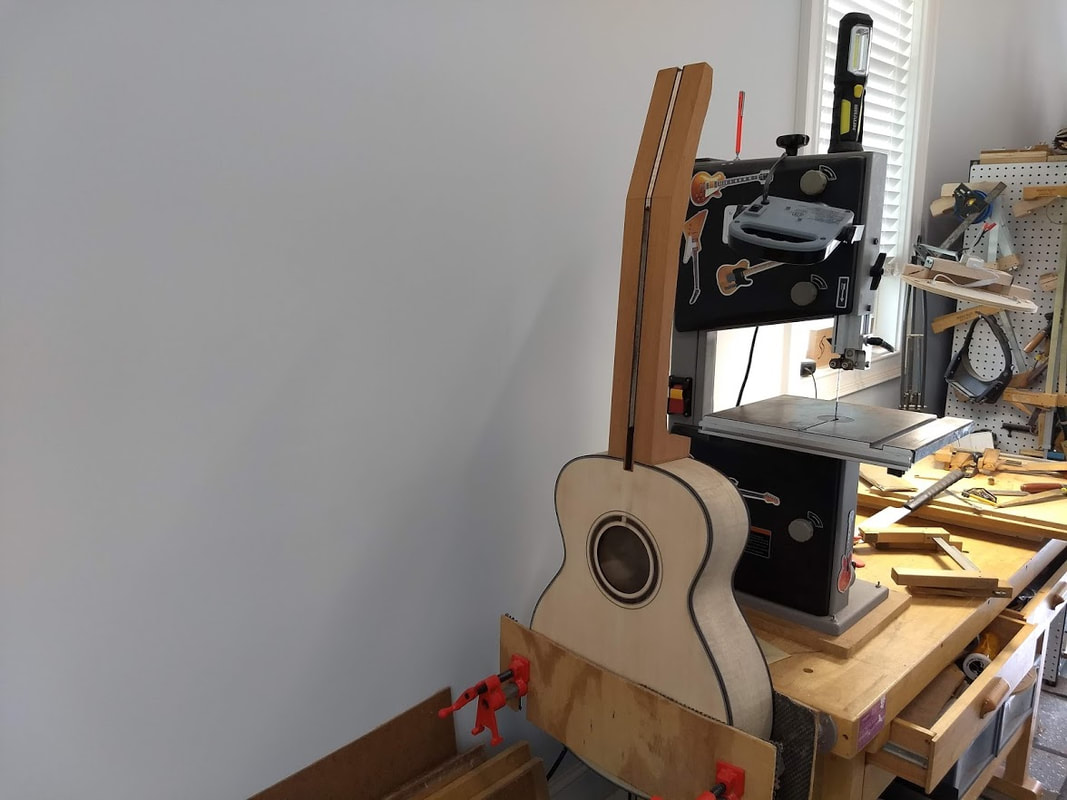 Looks like a nice fit. 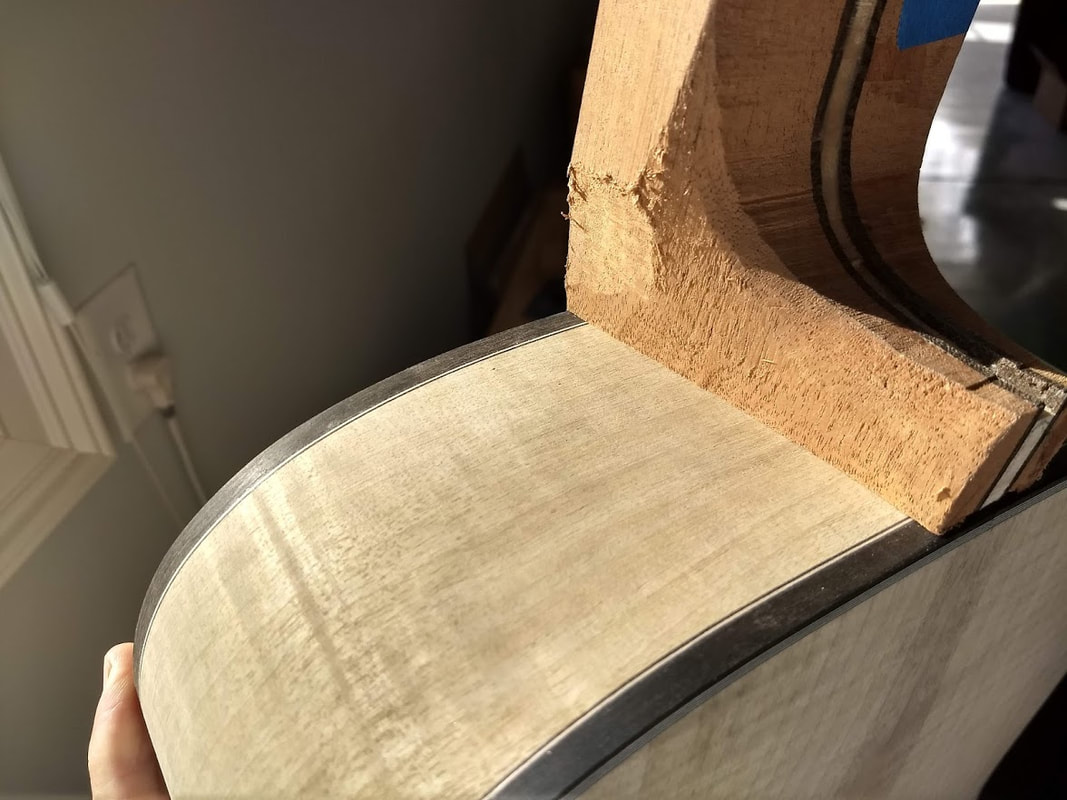 It's taking shape... Most of the frets have been installed. Two slots are used to place locating pins so the the fingerboard does not slide around when it is glued in place. I will have to illustrate the inlay process in another post. 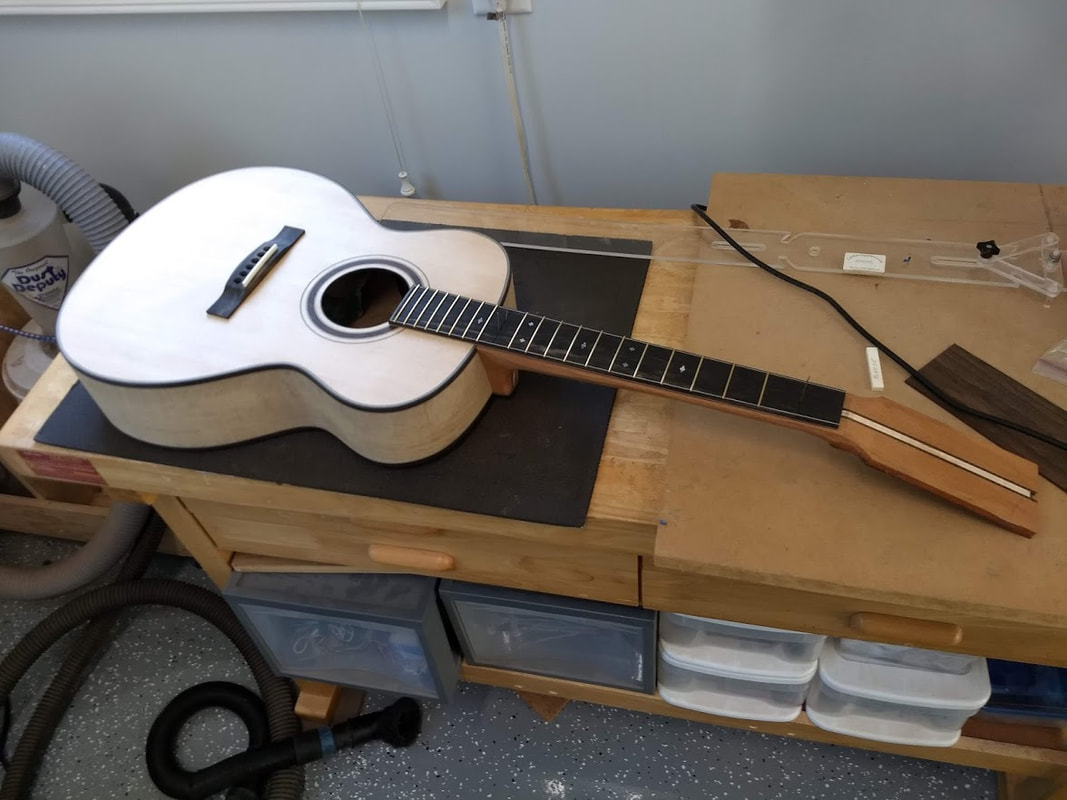 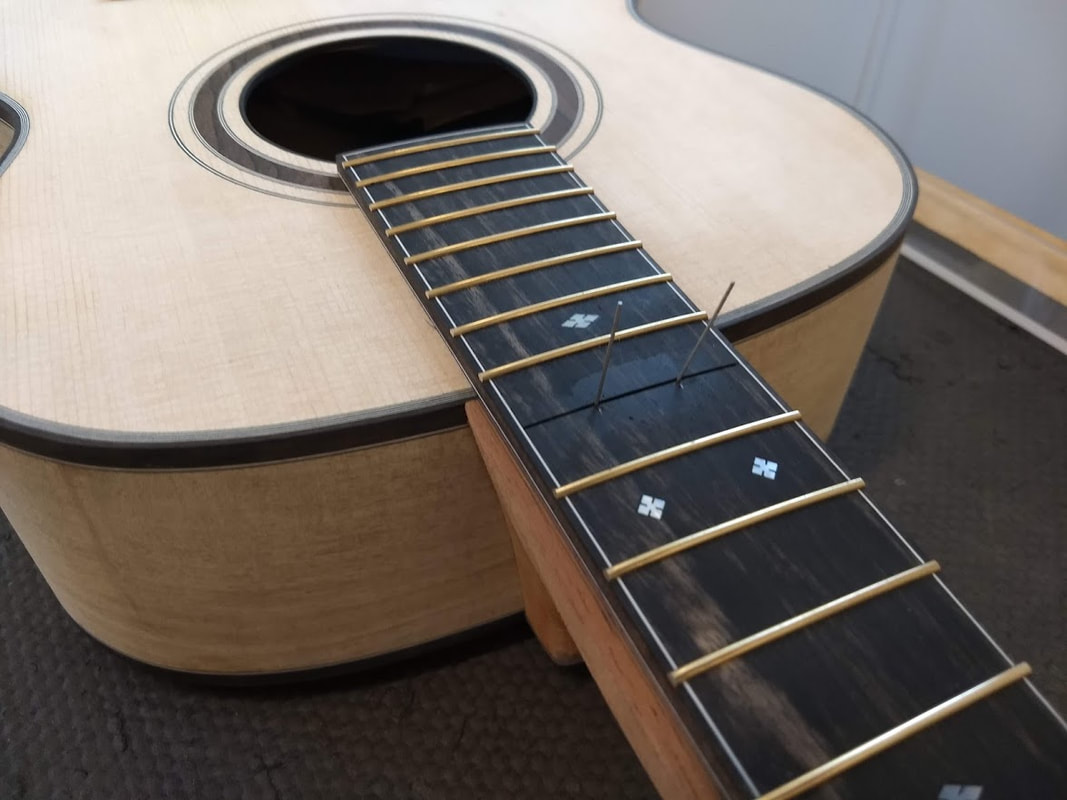 The Ziricote headplate is ready to be glued in place. 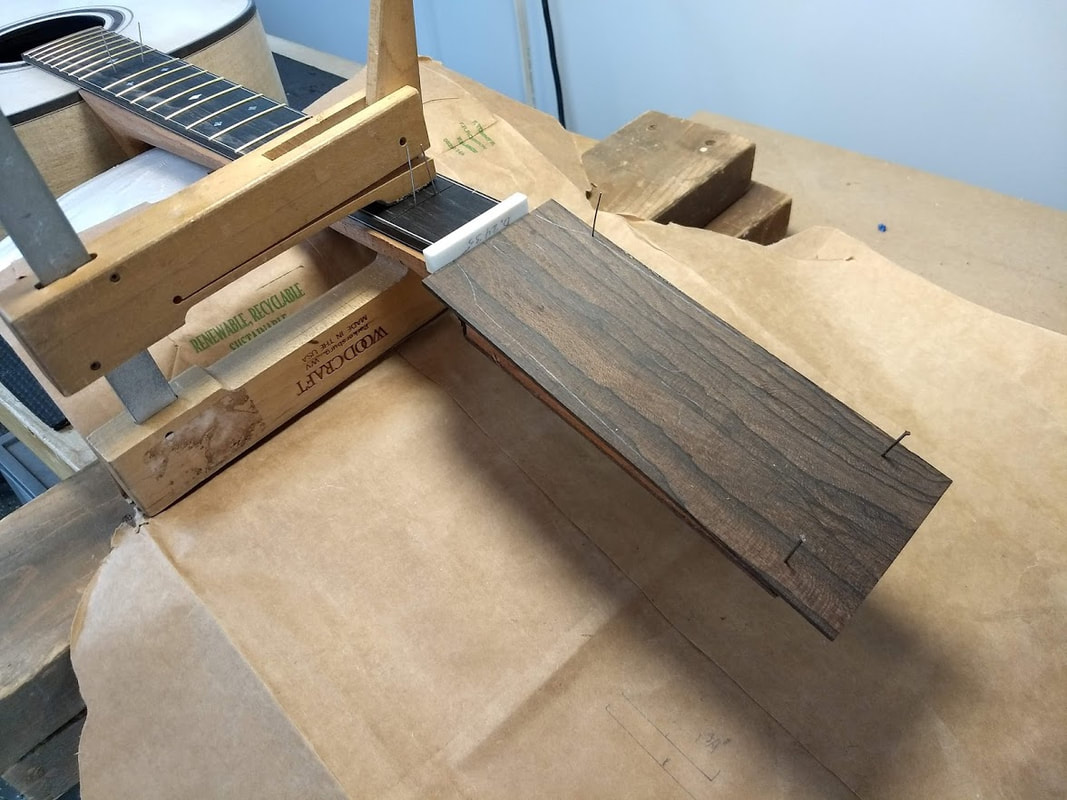  I'm gluing in the white purfling strip and binding the headstock. 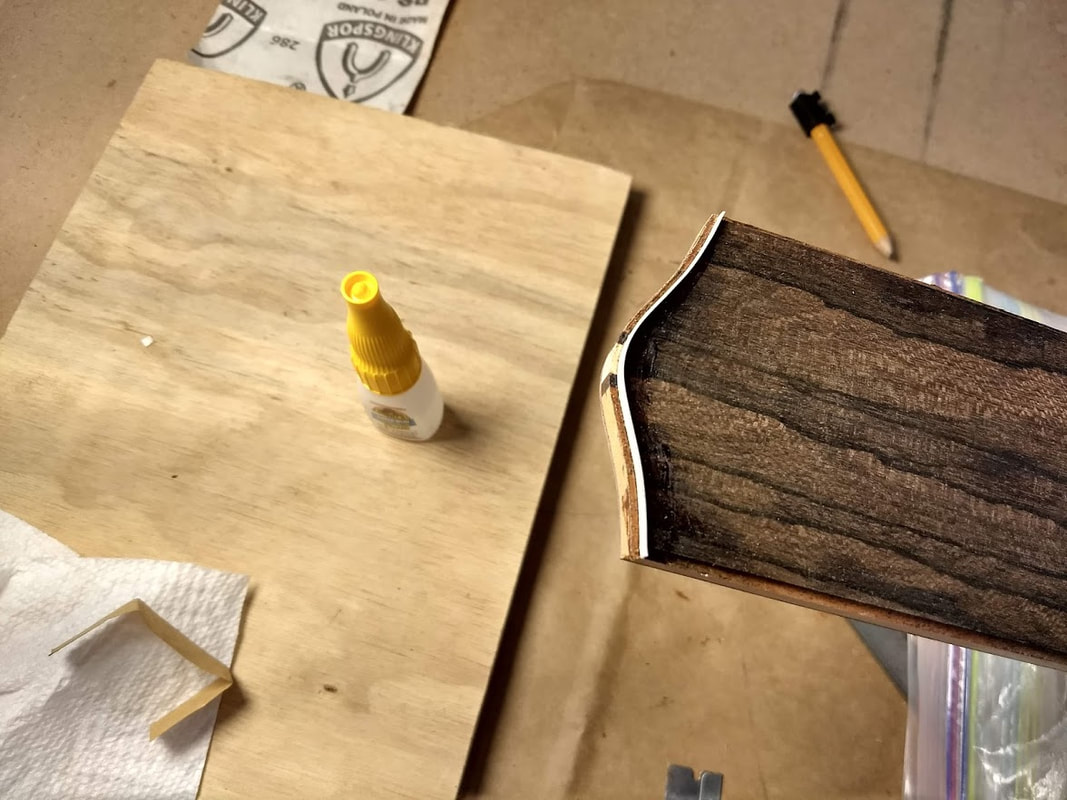 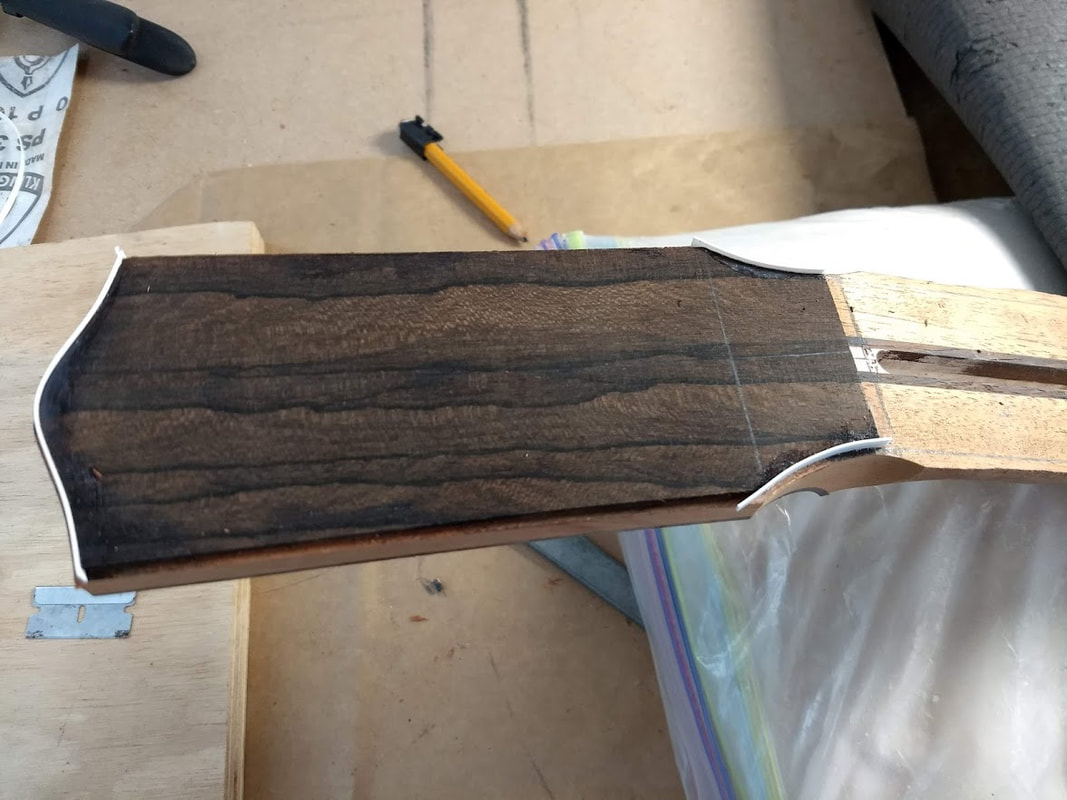 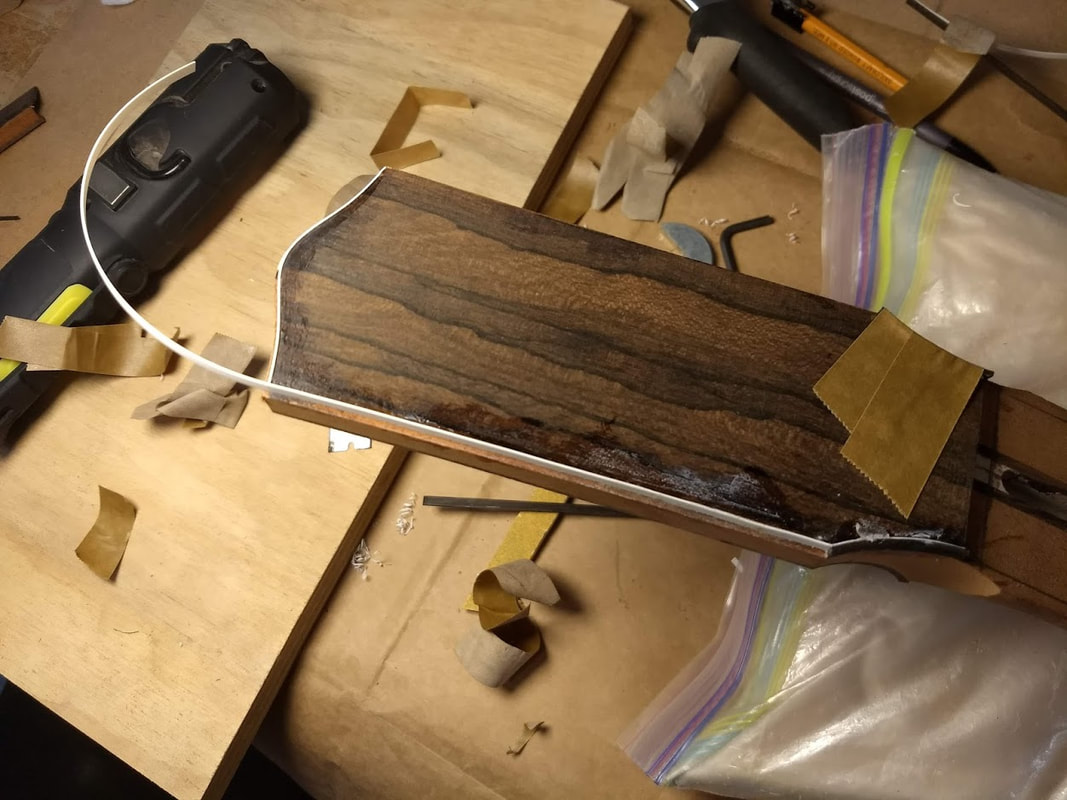 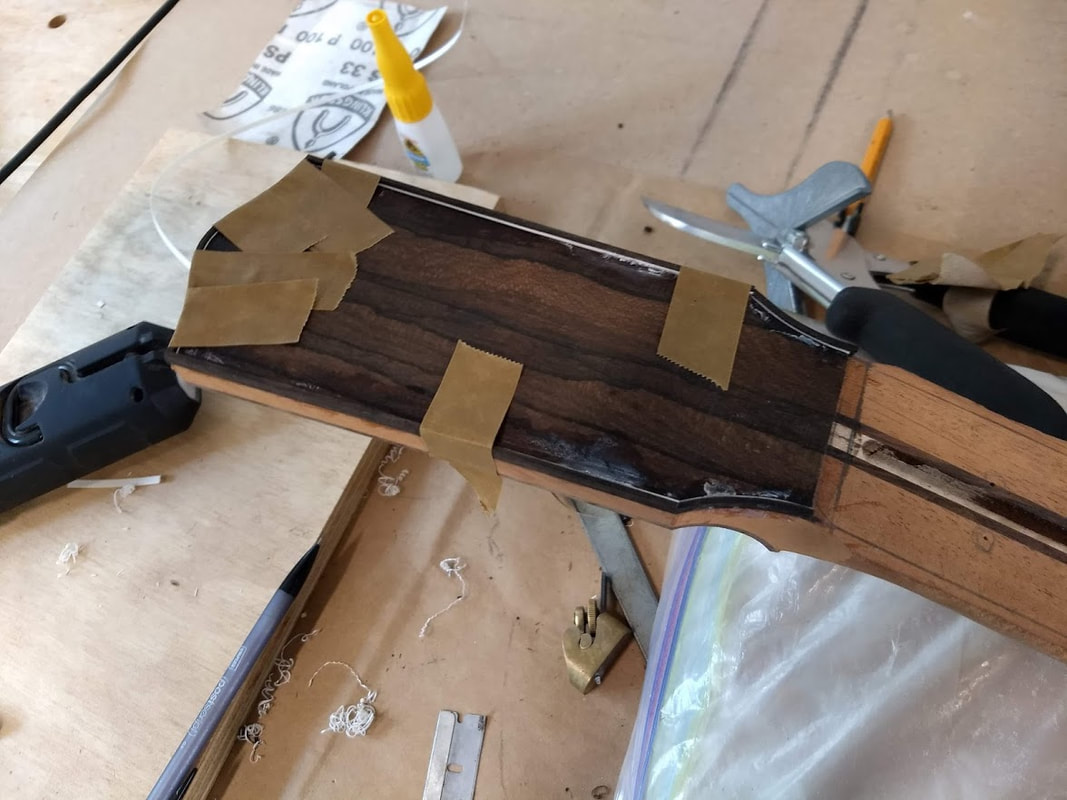 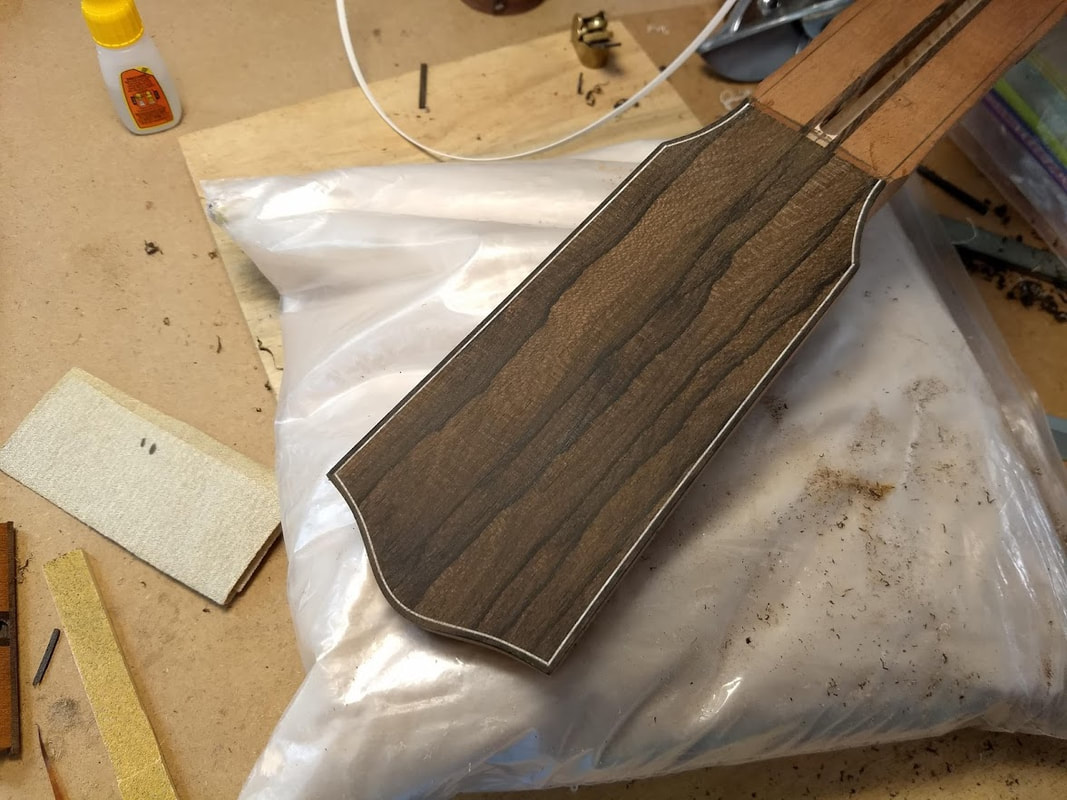 Time to finish carving the neck.  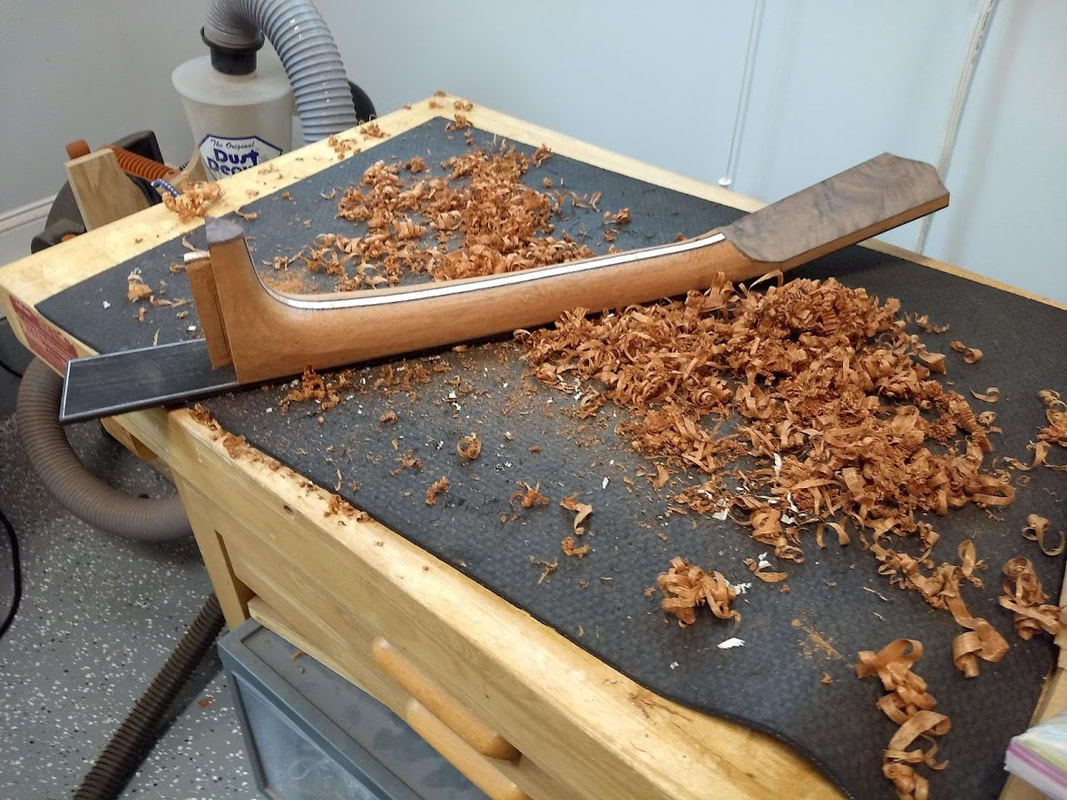 ...just about done! 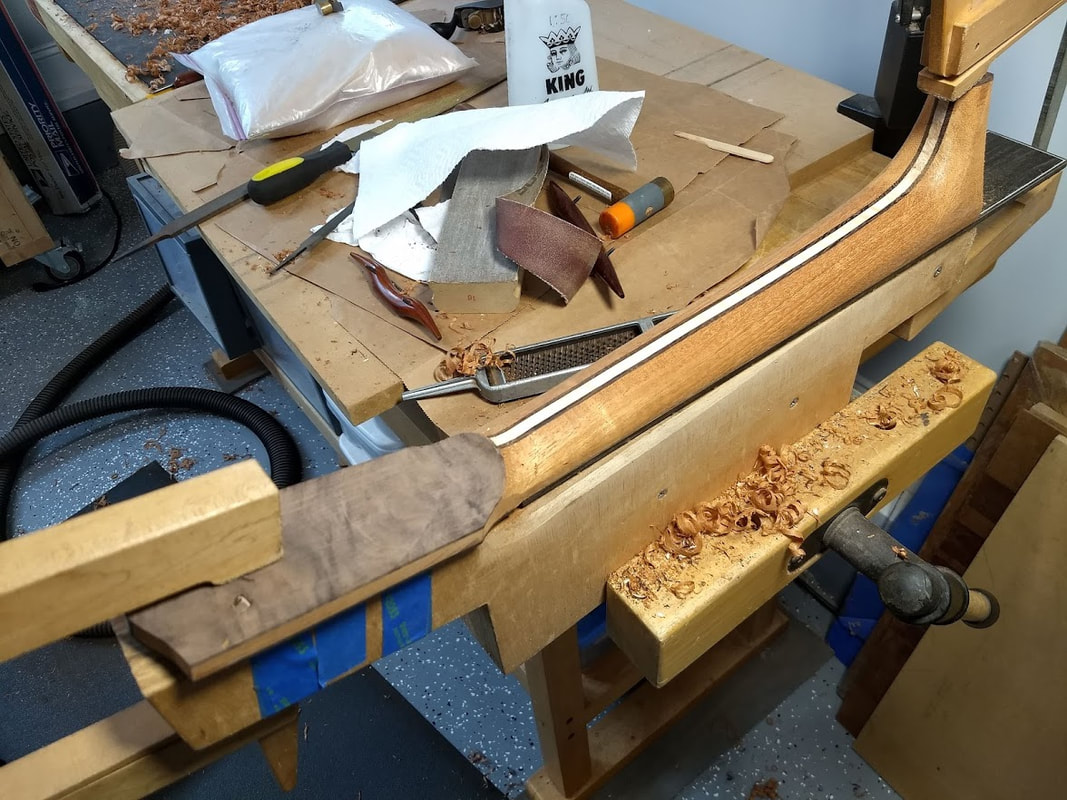 Okay! It's Ready for finishing! That's a whole 'nother thing. After finishing, the bridge will need to be glued on, the nut made, and the guitar set up for playing. There is actually a lot of work yet to do, but the construction phase is done. 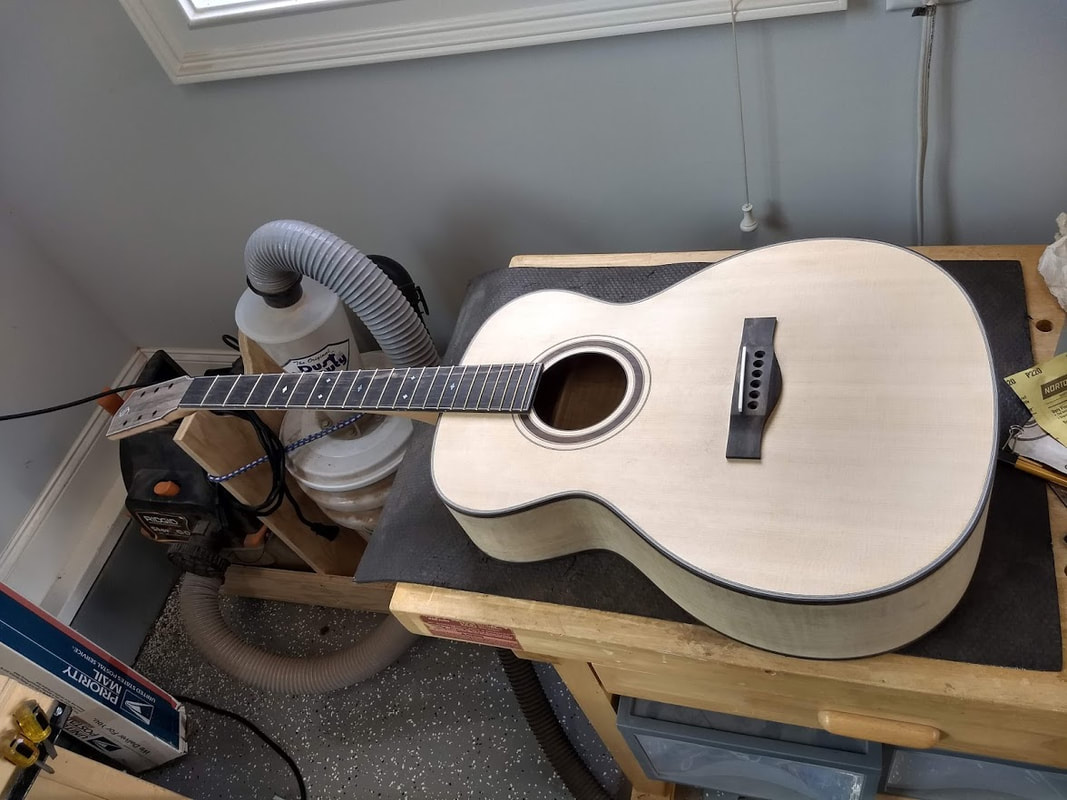  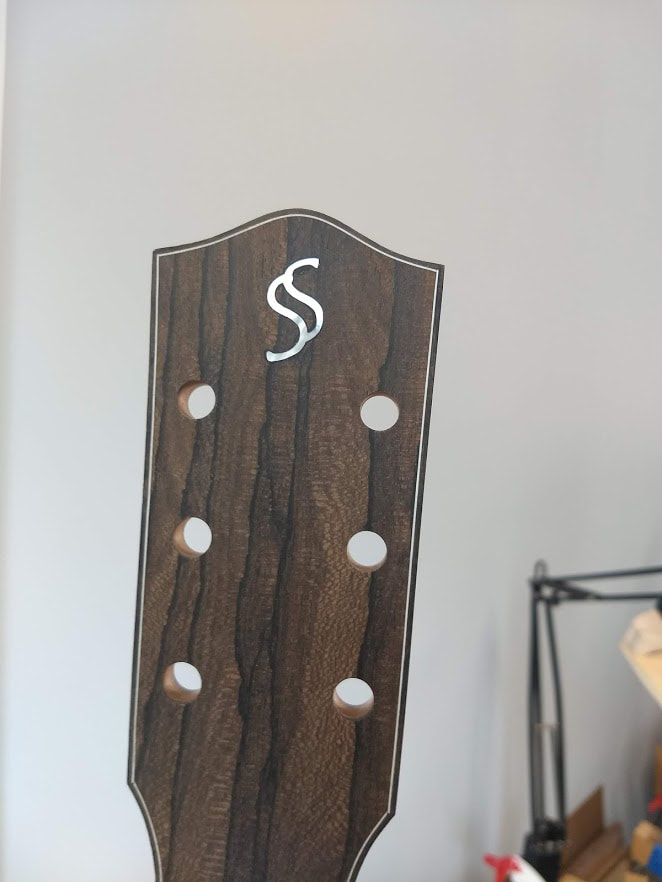
1 Comment
Kevin finally finished his L-00 build yesterday. The guitar turned out quite nice in every way. It looks good and sounds good (already). He had a lot of patience and stuck to it. I told him he should be very proud. My friend and neighbor Kevin is an Assistant Professor of Industrial Education at NC State University. He loves making things and has been very curious about the guitar making process. I offered to help him build a guitar. He has a lot of enthusiasm, patience, and a good aesthetic sense. He has a huge amount of red oak that he bought at a bargain price and he wanted to use that. I saw no reason not to. We looked through his pile and found a very nicely quartered and figured board. We cut is up and planed it down for back and sides. The board wasn't quite wide enough for the back so I contributed a piece of leopard wood for a 3 piece back. I think it will look quite nice. He chose an L-00 shape. He is making good progress. It is a pleasure teaching someone that really wants to learn. I told him that people pay good money for guitar making training. But, I am enjoying it as much as he is. I'm even contributing materials. 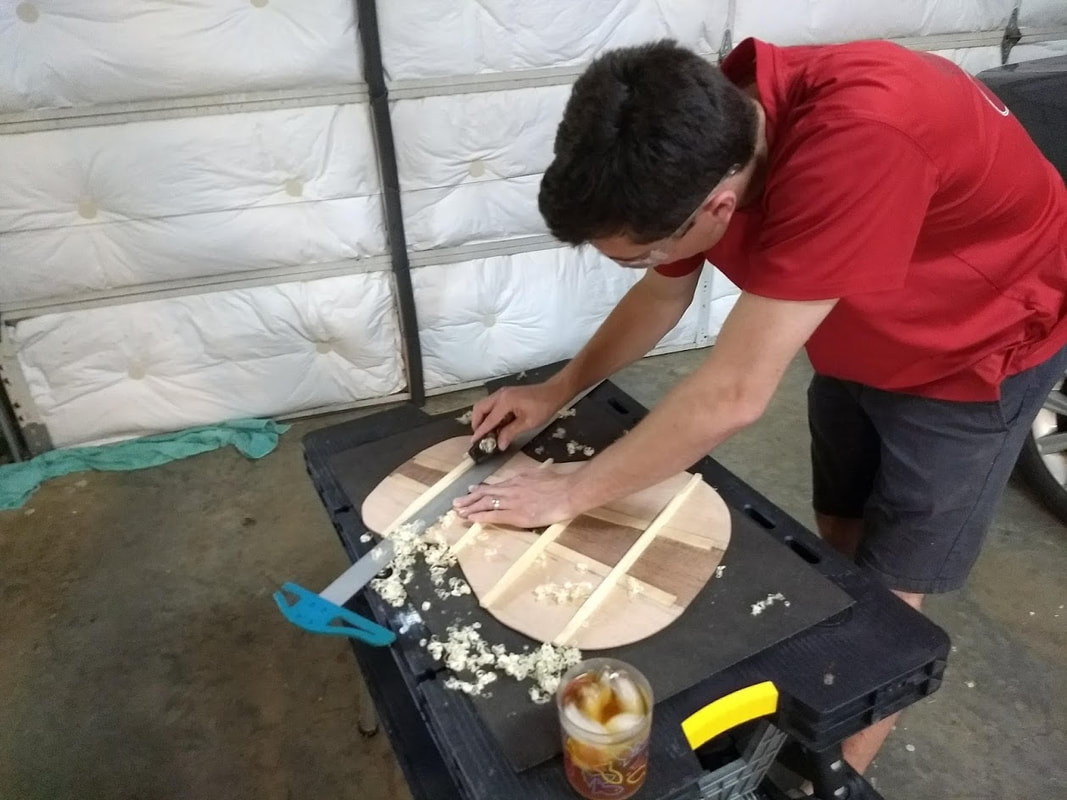 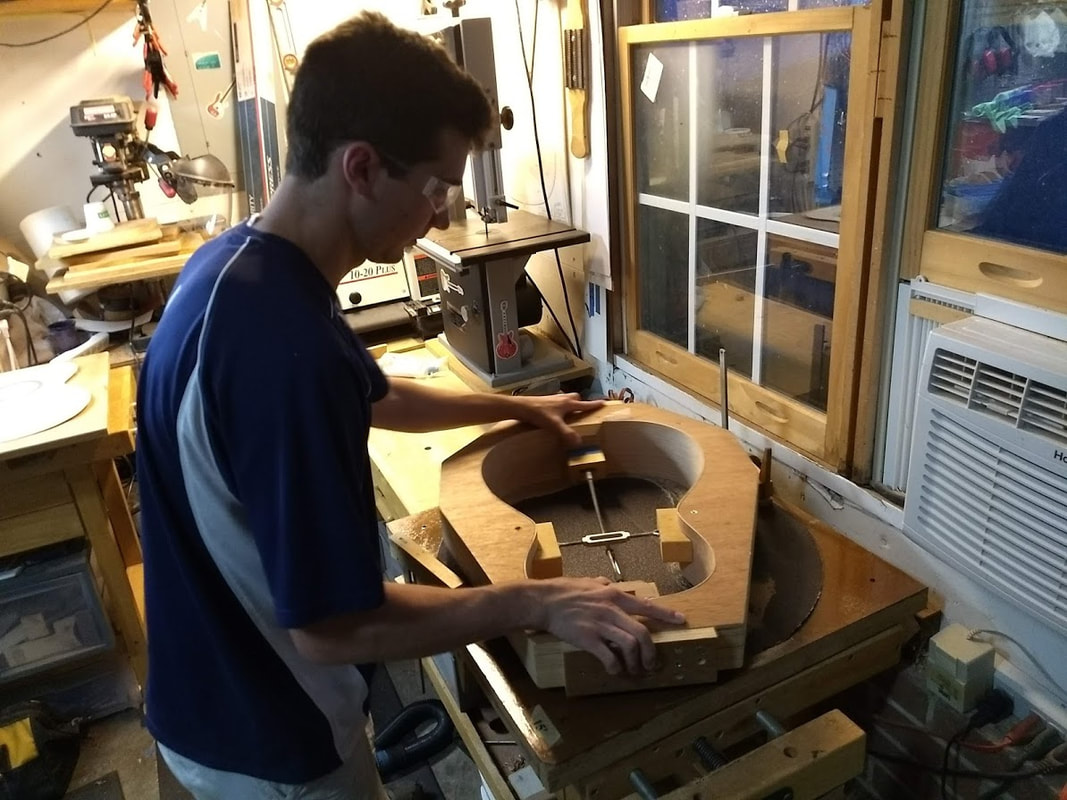 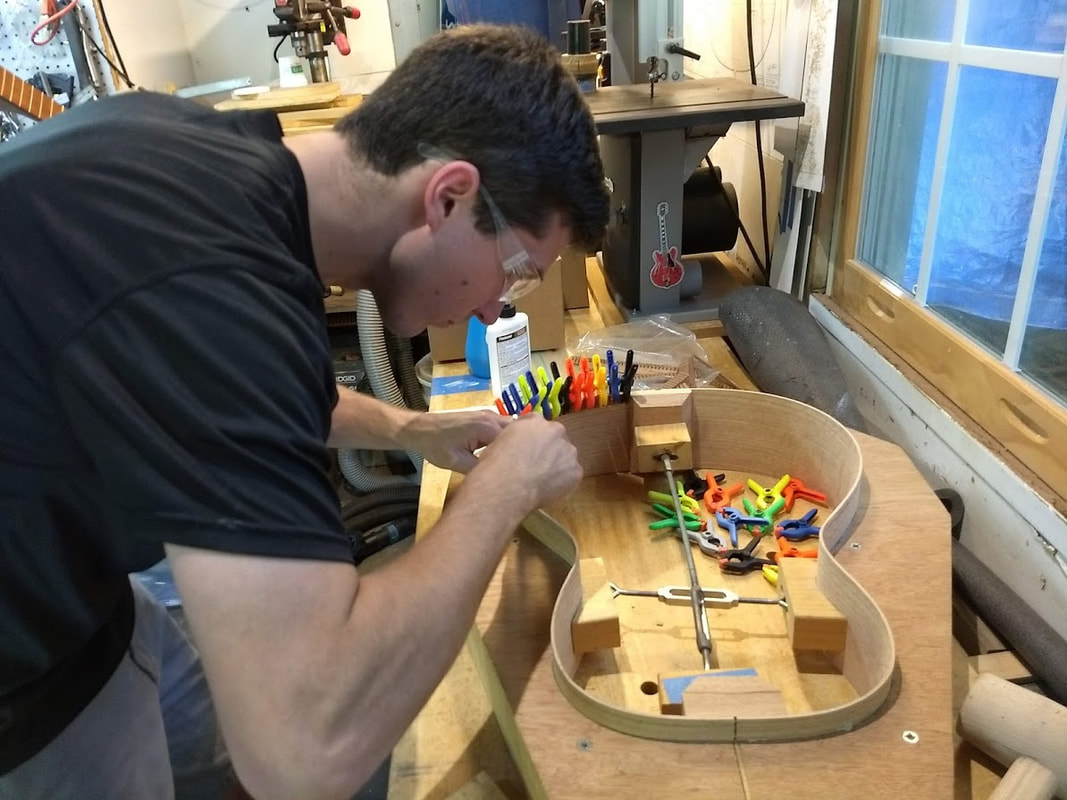 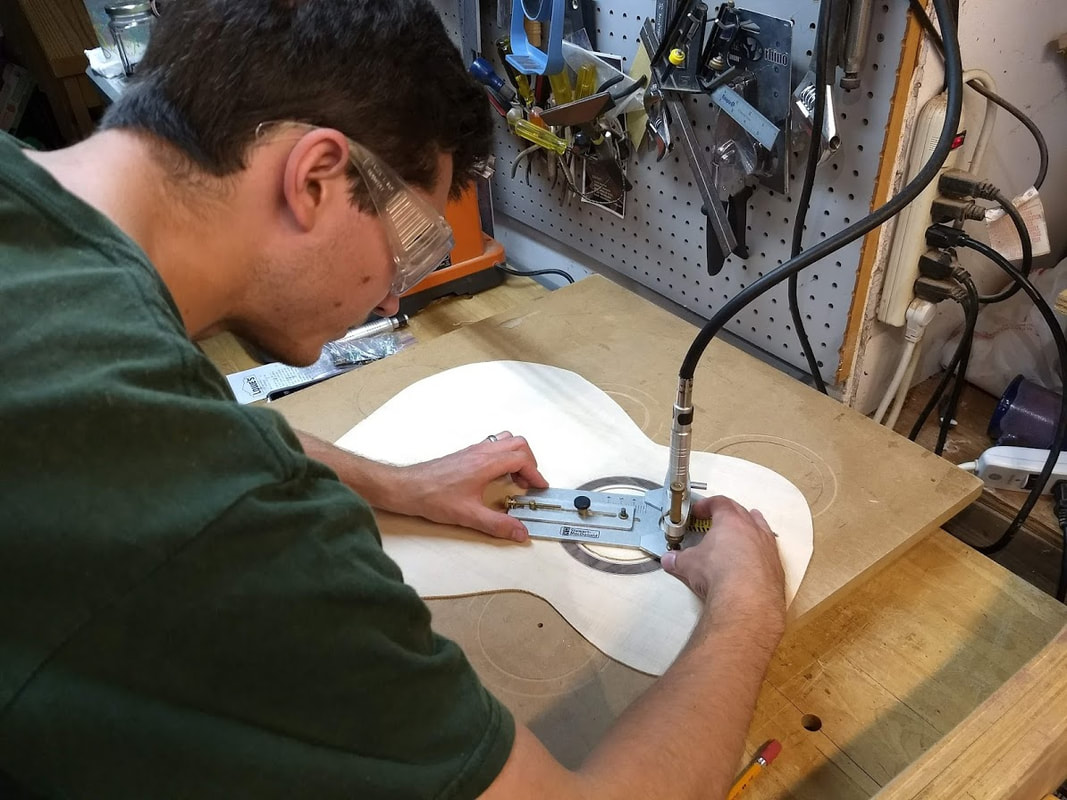 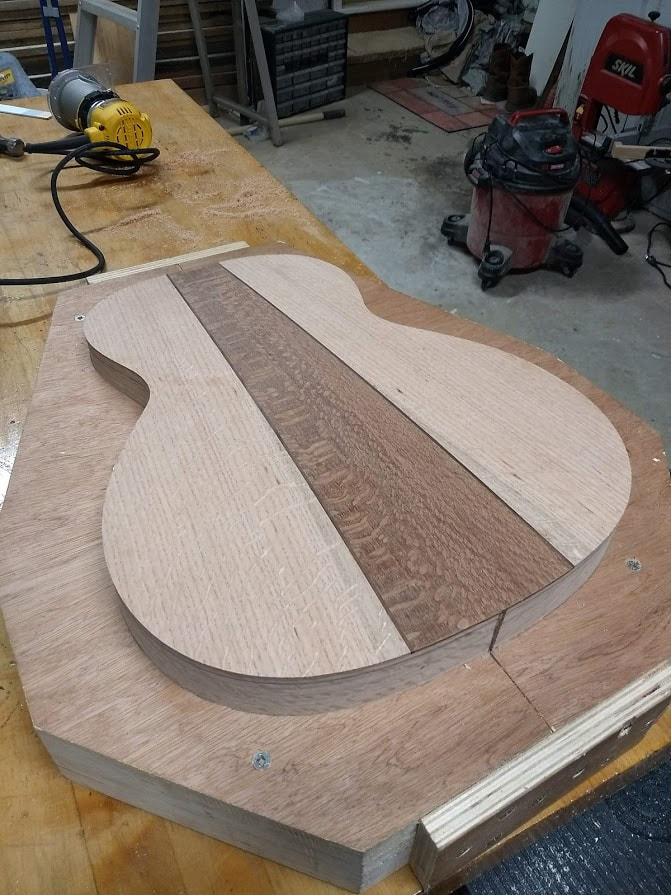 This is my first experience with CNC (Computer Numerical Control). This is not my machine. I worked with a friend on this. Many factories and high output guitar manufacturing operations utilize CNC for shaping various parts for construction. All of the parts for my guitars are made with my own hands, hand tools, some standard woodshop power tools, and the jigs I have made. I have to admit, CNC is pretty cool. The design for a project is sketched out in software and a motorized router is directed on tracks to cut according to the project's specifications. It is actually not that difficult design the project and operate the machine. My logo in the sign is inlaid rosewood. The rosewood was cut to shape and then the pocket for the logo cut out for a perfect fit. The logo was then inlaid into the sign. After that, we followed with the lettering. I may consider using CNC in the future, but for now, I'm satisfied to continue with my current methods... 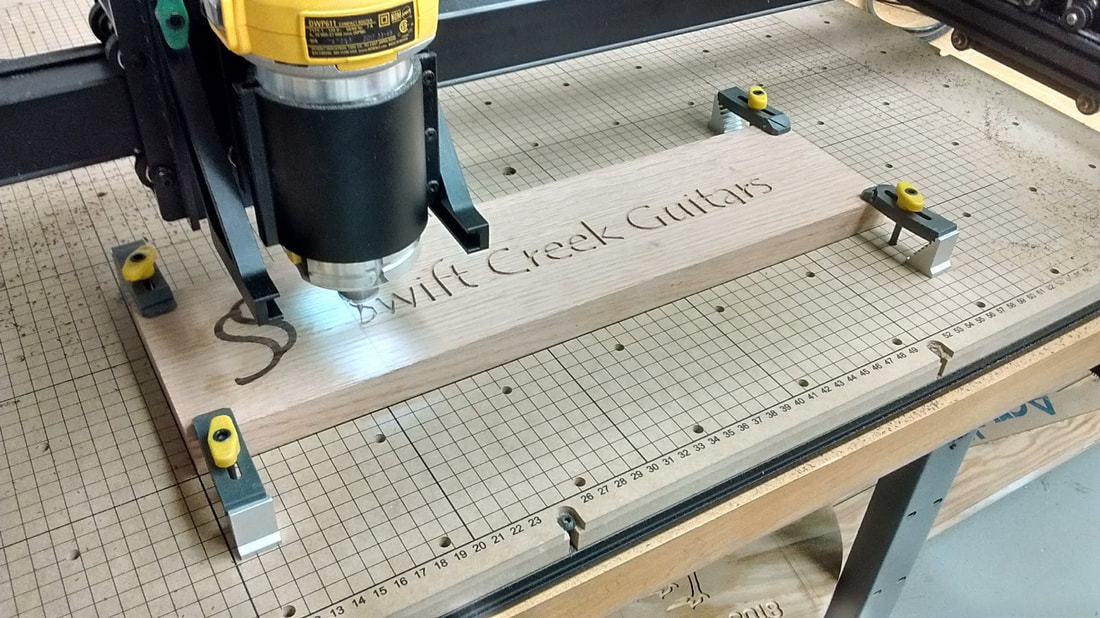 My neighbor is working on his doctorate at NC State University in industrial education. He asked me to be a guest lecturer to a 100-level industrial education class on the processes of guitar making. The processes I discussed included; the design plan, joinery, dimensioning, bending, routering, inlay, and finishing. I prepared a PowerPoint presentation and gave a lecture to two classes yesterday. I brought a finished guitar, a braced top, and a set of plans. There were a lot of photos. The lectures were well received and I had a great time. No pictures of me lecturing, but here's a shot of shop time after the lecture... 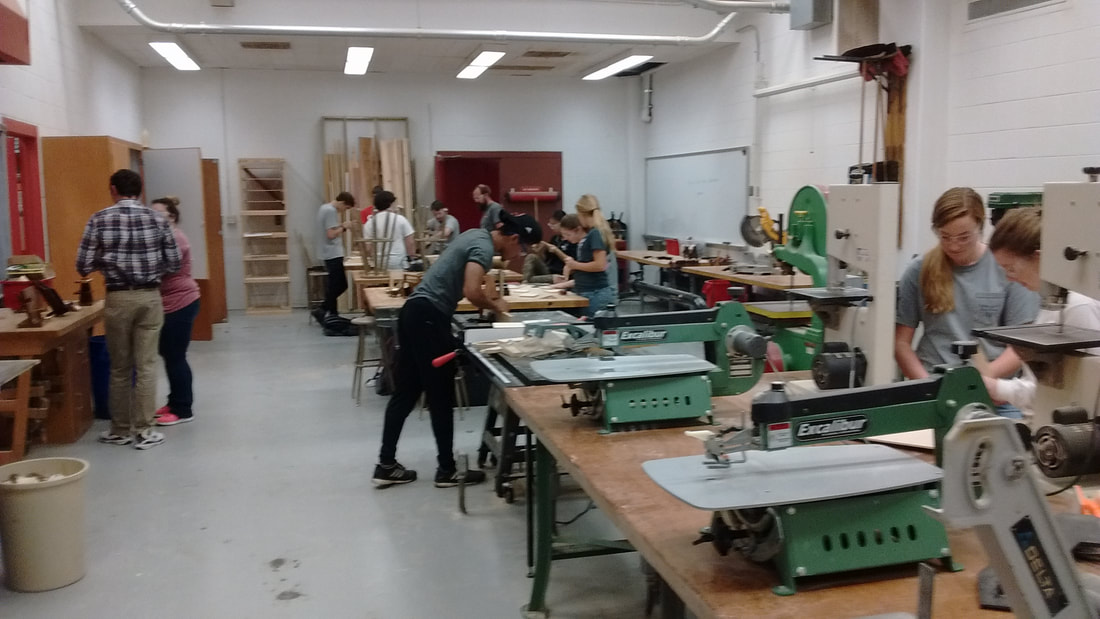 I haven't posted in a while but it's not because I'm not doing anything. I'm actually working on three builds at a time, including working on my first carved top (or archtop) guitar. This is in the style of a Gibson CS-336. It is sorta like a shrunken ES-335, with the exception that the construction is quite different. An ES-335 has bent ribs (or sides) and the top and back are pressed laminated wood. The CS-336 is constructed by hollowing out a slab of mahogany and the top is carved. In order for the top to be able to be carved it must be thick enough. I am starting with a 5/8" nicely figured maple top. Before beginning the top carving, I initially used a forstner bit to hog out most of the insides and that was followed by a router. In addition, I had to rout the channel for the binding (I didn't take any photos of that procedure). Also, I had to plane the appropriate angle for the fingerboard (and neck) to ensure that the strings are the right height at the bridge. After this is done, I can begin the top carving. I have placed the maple top on the body with only screws at this time. I will need to remove the top and carve out the inside of the top. The objective is to have the top approximately 1/4" thick. Once that is achieved, I will be able to rout the mortise for the neck , cut in the f-holes and complete carving the top. I started carving by hogging off a large amount of maple using an attachment to a grinder. That is followed by using a small concave bottom hand plane. Of course all of this will be followed by a lot of sanding... To access the electronics I installed an access hole in the back. This is accomplished by using various routing templates. There is a lot of work ahead... Many pieces of different types of woods are used to construct a mosaic rosette. In this case, these woods are spalted tamarind, lacewood, and red heart. Small sheets are sanded to the same thickness and then cut into strips and the edges are sanded level. Each piece is then glued together separated by a thin piece of black fiber, cut again, and then positioned such that a circular rosette can be cut out. The design is random in this kind of rosette and so every one is unique. This one will be used in an upcoming build. 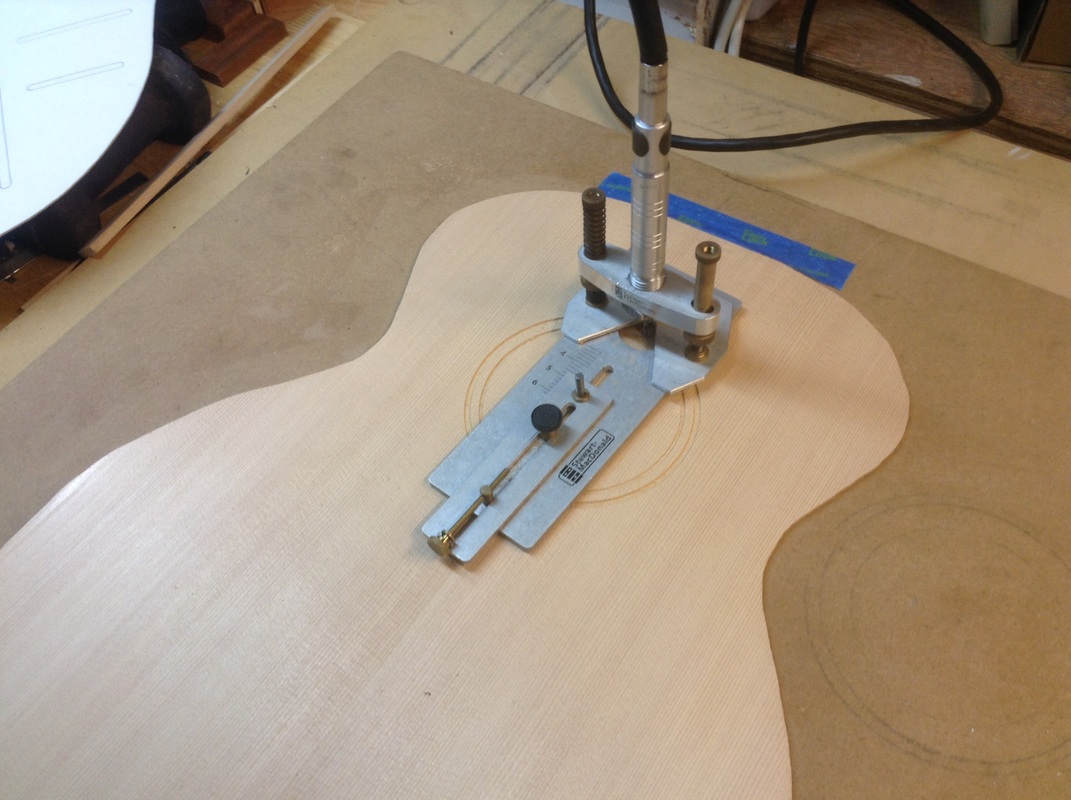 After the top has been tested for deflection, the location of the rosette is determined and the "micro" router jig is used to route out the channel for insertion of the rosette ring. At this point I had already pieced together the wood mosaic and cut it out. 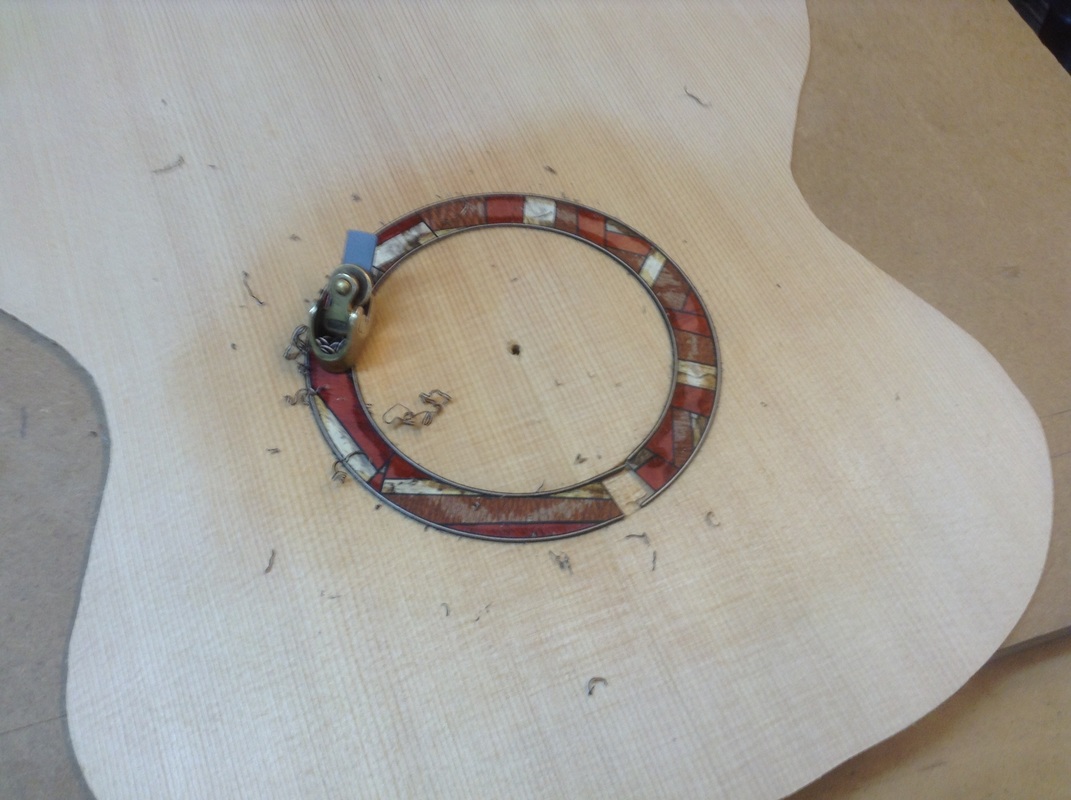 The rosette and black fiber purfing in dry fitted to ensure fit and the channel and surrounding area is wiped with shellac. I intended to use thin Cyanoacrylate (super glue) to glue in this rosette. Shellac seals the spruce top and prevents the glue from staining the top. The rosette is placed into the channel dry and then flooded with Cyanoacrylate. Once the glue dries the black fiber purfling can be leveled with a finger plane.
Here's how it came out... 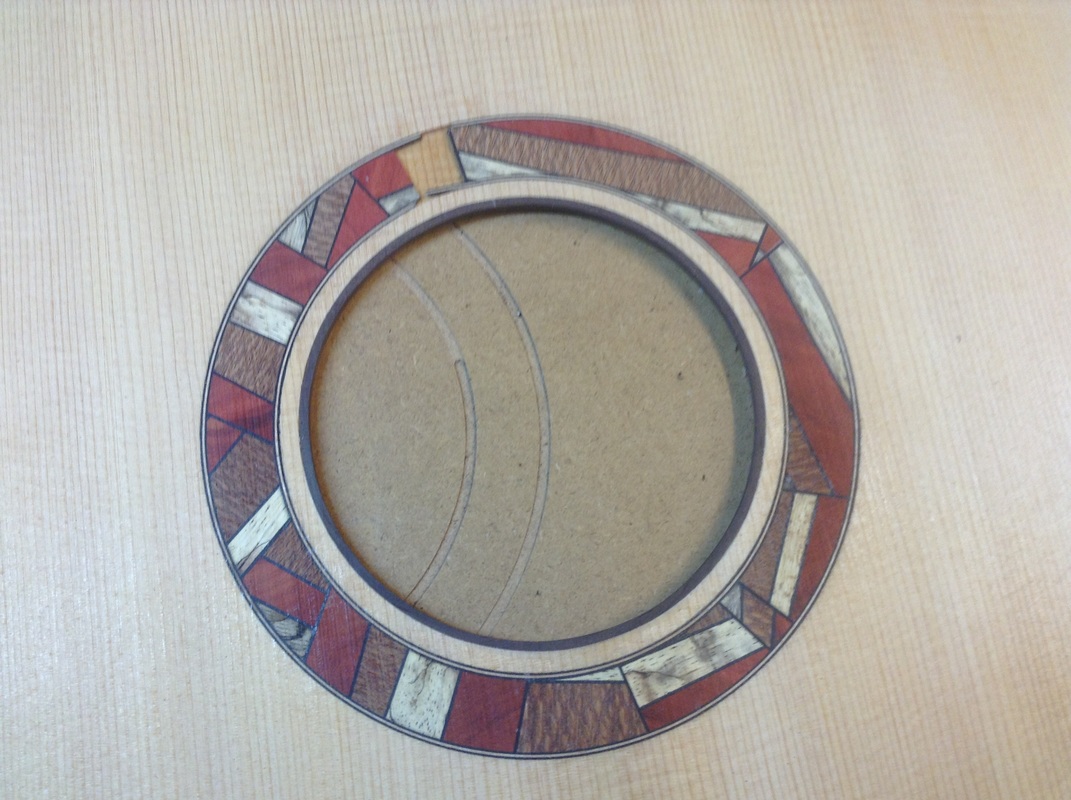 Today I am continuing the finishing of two guitars, a grand auditorium w/ Florentine cutaway and a tele style electric. At this point I have put on several coats over the course of a few days. Each day before I start a new round of spray applications I level sand w/ 400 grit sandpaper. Level sanding removes a fair amount of finish, so it takes several days to build up enough coat to make sure I don't sand through the finish during final wet sanding and buffing. The trick is to make sure you don't sand through, but not make the finish too thick. It comes with experience. I have constructed a spray booth using dense foam insulation. The wings are hinged so it can be collapsed and stored easily. A simple 20"X20" box fan is placed behind the booth w/ a 20"X20" opening that accommodates a furnace filter to capture overspray. The window behind the booth is open to the outside. I don't need an explosion proof fan because I am using water based finish. My finish is Target Coatings EM 6000. I have been very pleased with this finish and after a few guitars I have become accustom to it's characteristics. It has excellent properties that are conducive to application and the end result is a pleasing nitro-like appearance. I use a Fuji Q3 HVLP (High Volume Low Pressure) spray system. The spray gun is retrofitted to accept a smaller finish reservoir which is more conducive to guitar finishing. |

- Home
- Bio
- Highlights
- Collection of Work
-
Model Details
- Mutenye OM Cutaway
- Cherry L-00 Style
- "Uptown"
- "SS Jr."
- 000-12 w/ Venetian Cutaway
- Black Limba OM w/ Sailboat Inlays
- SG-Tele Style Electric
- Deep OM in Figured Oregon Myrtle
- L-00 Style, Cutaway with Sunburst
- Walnut and Redwood Grand Auditorium
- Maple OM
- 000 12 Fret Maple and Leopard Wood
- Small Jumbo w/ Florentine Cutaway
- Grand Auditorium w/ Venetian Cutaway
- CS-336 Style Archtop Electric
- L-00 Style 12 Fret
- Grand Auditorium w/ Florentine Cutaway
- T-Style Electric
- Slope Shoulder Dreadnought
- 000 12 fret Cutaway
- OM - Peruvian Walnut w/ Sinker Redwood Top
- L-00 Style w/ Sunburst Top
- Grand Auditorium - Black Limba
- OM w/ Florentine Cutaway
- Thinline Tele-Style
- The Process
- "On the Bench"
- Contact


